
Writing with Roam
How I use Roam Research for writing essays

Four years ago, I posted on Twitter

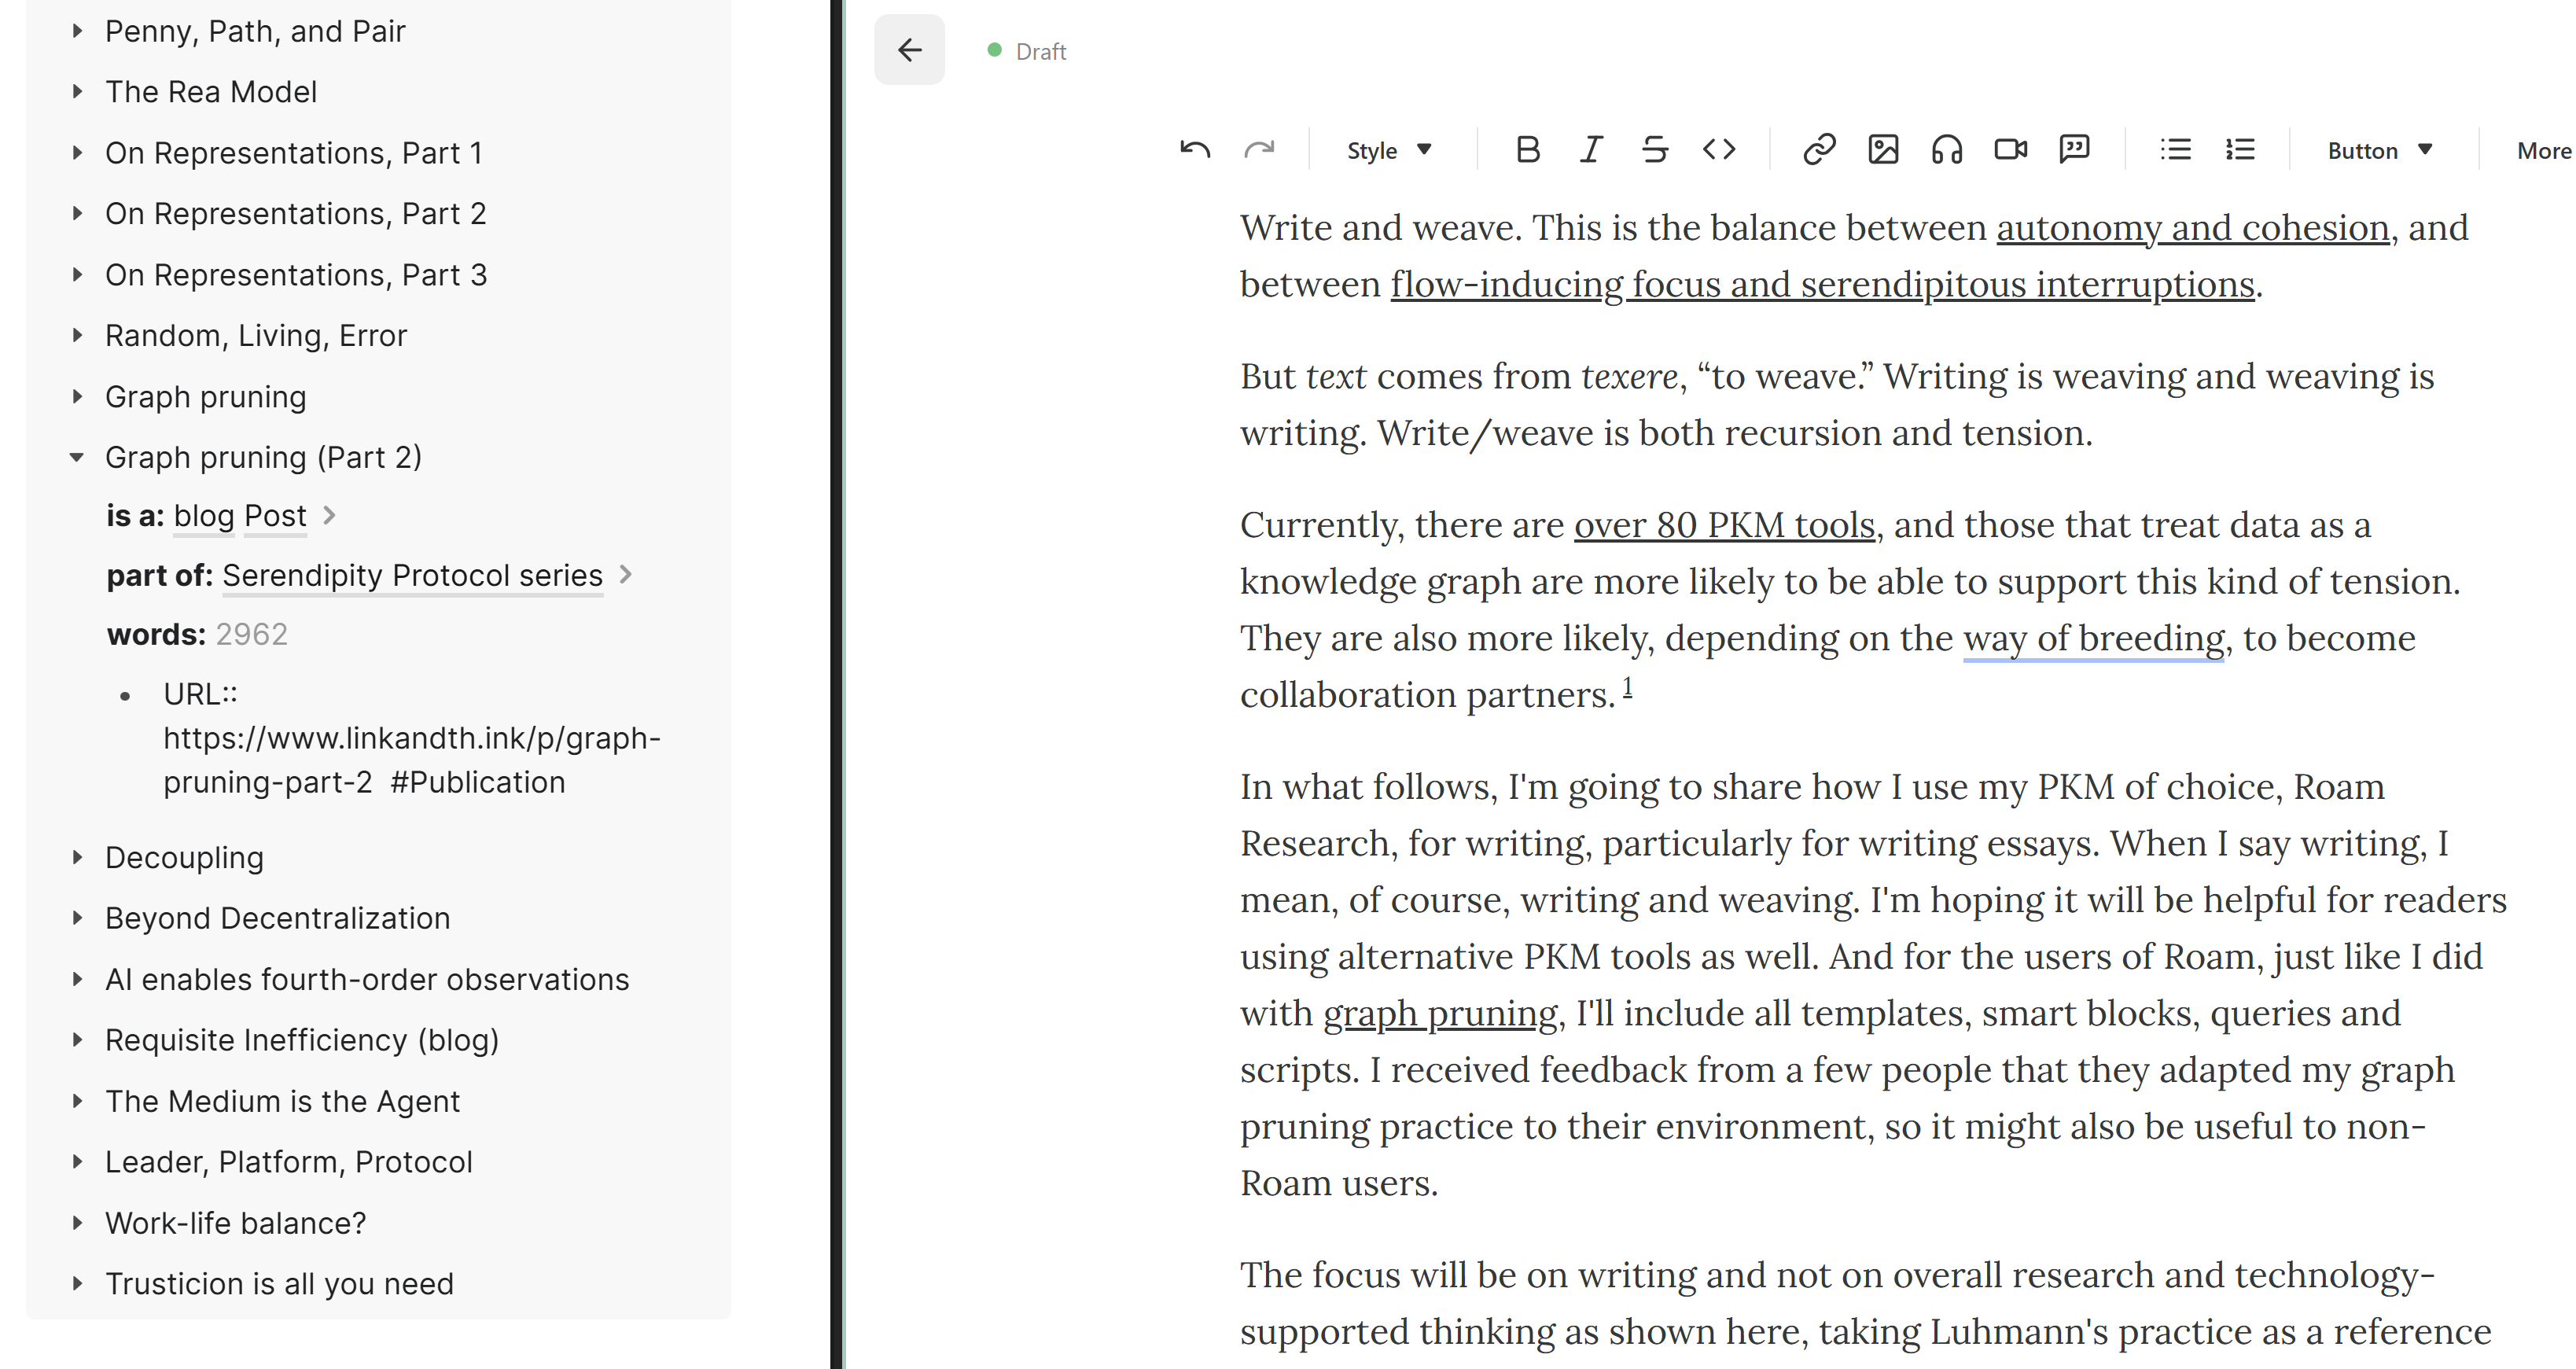
Write and weave. This is the balance between autonomy and cohesion, and between flow-inducing focus and serendipitous interruptions.
But writing is itself weaving. The word text comes from texere, “to weave.” Write/weave is both recursion and tension.
Currently, there are over 80 PKM tools, and those that treat data as a knowledge graph are more likely to support this kind of tension. They are also more likely, depending on their breeding, to become collaborators partners.1
In what follows, I'm going to share with you how I use my PKM of choice, Roam Research, for writing, particularly for writing essays.
When I say writing, I mean, of course, writing and weaving.
I'm hoping this article will bring insights to readers using alternative PKM tools as well. I'll include all templates, smart blocks, queries and scripts, just like I did with graph pruning. The users of Roam can directly apply these. Since a few people told me they adapted my graph pruning practice to their tool of choice, I hope that even the specific technical details shared here might be helpful to non-Roam users.
The focus will be on writing and not on overall research and technology-supported thinking, as shown below (taking Luhmann's practice as a reference framework).

But these three loops repeat within the loop of writing. It's likely then that you find patterns applicable beyond the practice of essay writing.
Workflows
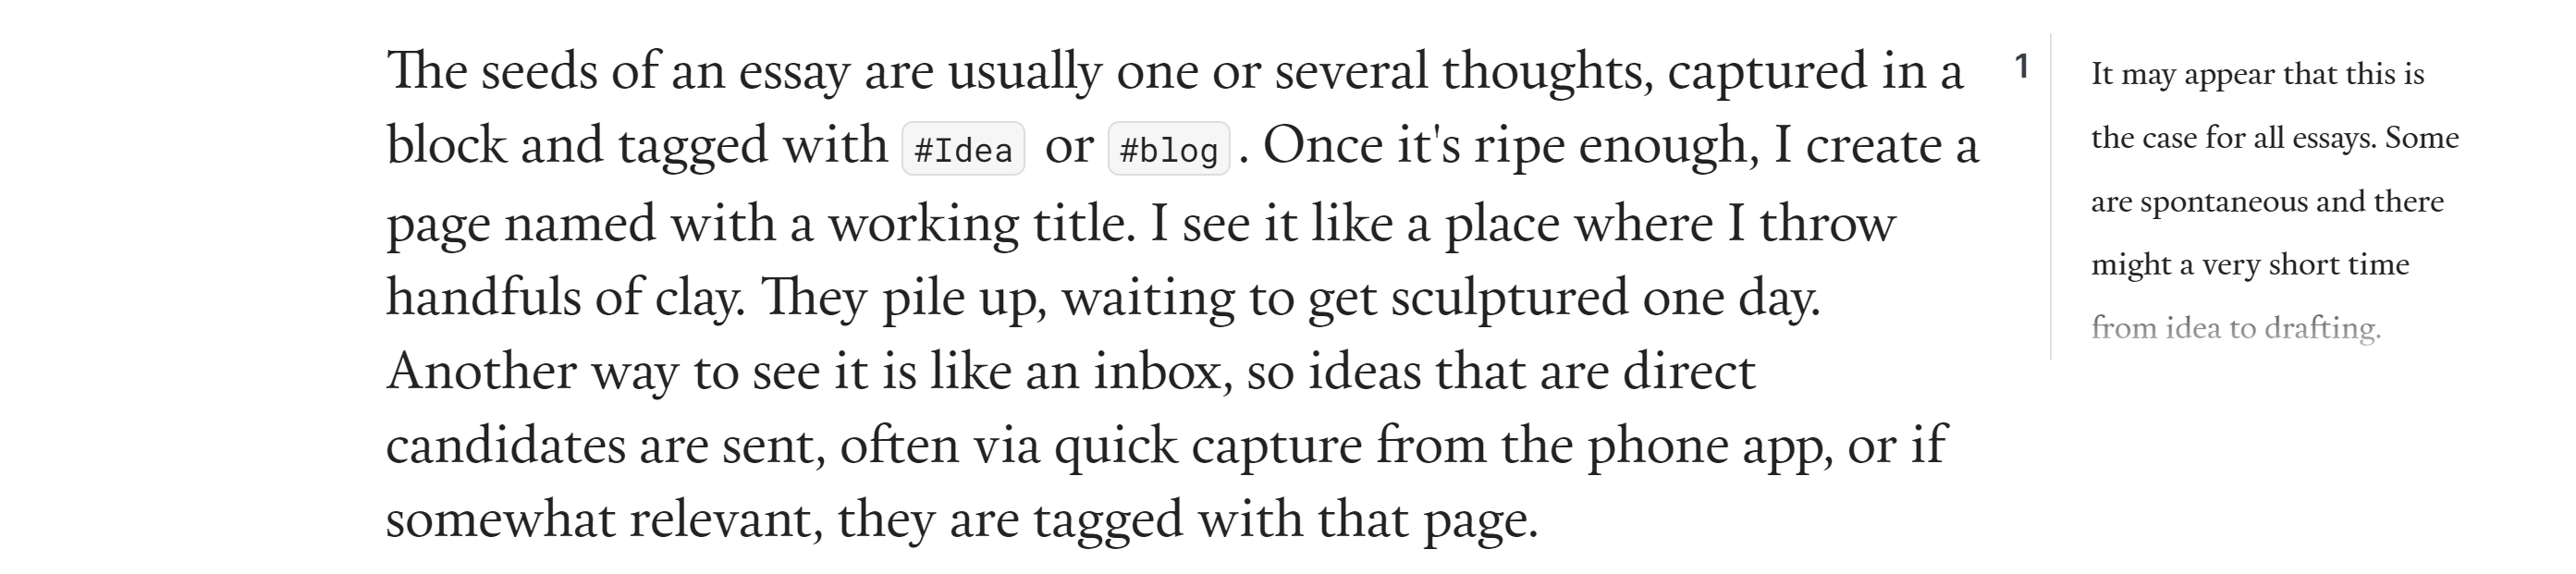
For me, the seeds of an essay are usually one or several thoughts, captured in a block and tagged with #Idea or #blog. Once it's ripe enough, I create a page named with the working title for the post.
I see it like a place where I throw handfuls of clay. They pile up, waiting to get sculptured one day. Or I think of it as an inbox: direct candidates are sent, often via quick capture from the phone app, while those that are only somewhat related are tagged with that page.
Now, speaking of tags, at some point in the process, relevant papers and essays, whether random or part of the selection, are tagged. And not just with a tag for their main topic, but also with a specific tag for that future essay. That happens on Readwise and the Readwise reader. A few words on that.
All selected HTML articles, PDF papers and EPUB books end in Readwise (I use it on an e-ink device, which makes the experience even better). Most documents are tagged either during capture (effortless from both the browser extension and the phone app) or later when used on the Reader.
But then, apart from the usual tagging, which I call “topic-tagging” (and of course, such tags are typed as Topic and Topic is a RIO class), I need to group items that are part of the research for a particular essay. It is neither practical nor possible (since all Readwise tags are small letters) to use the Roam page title, although in other use cases, this will be the most natural thing to do. So I came up with a short Readwise tag,2 which works like an essay alias for the items sent from Readwise to Roam.
You'll see later how this tag is used in a query that ensures all pertinent Readwise items were reviewed during research and writing. By Readwise item, I mean a whole document, such as an article or a book, or a highlight/ annotation, tagged separately, in cases when only that quote or that note might be relevant.
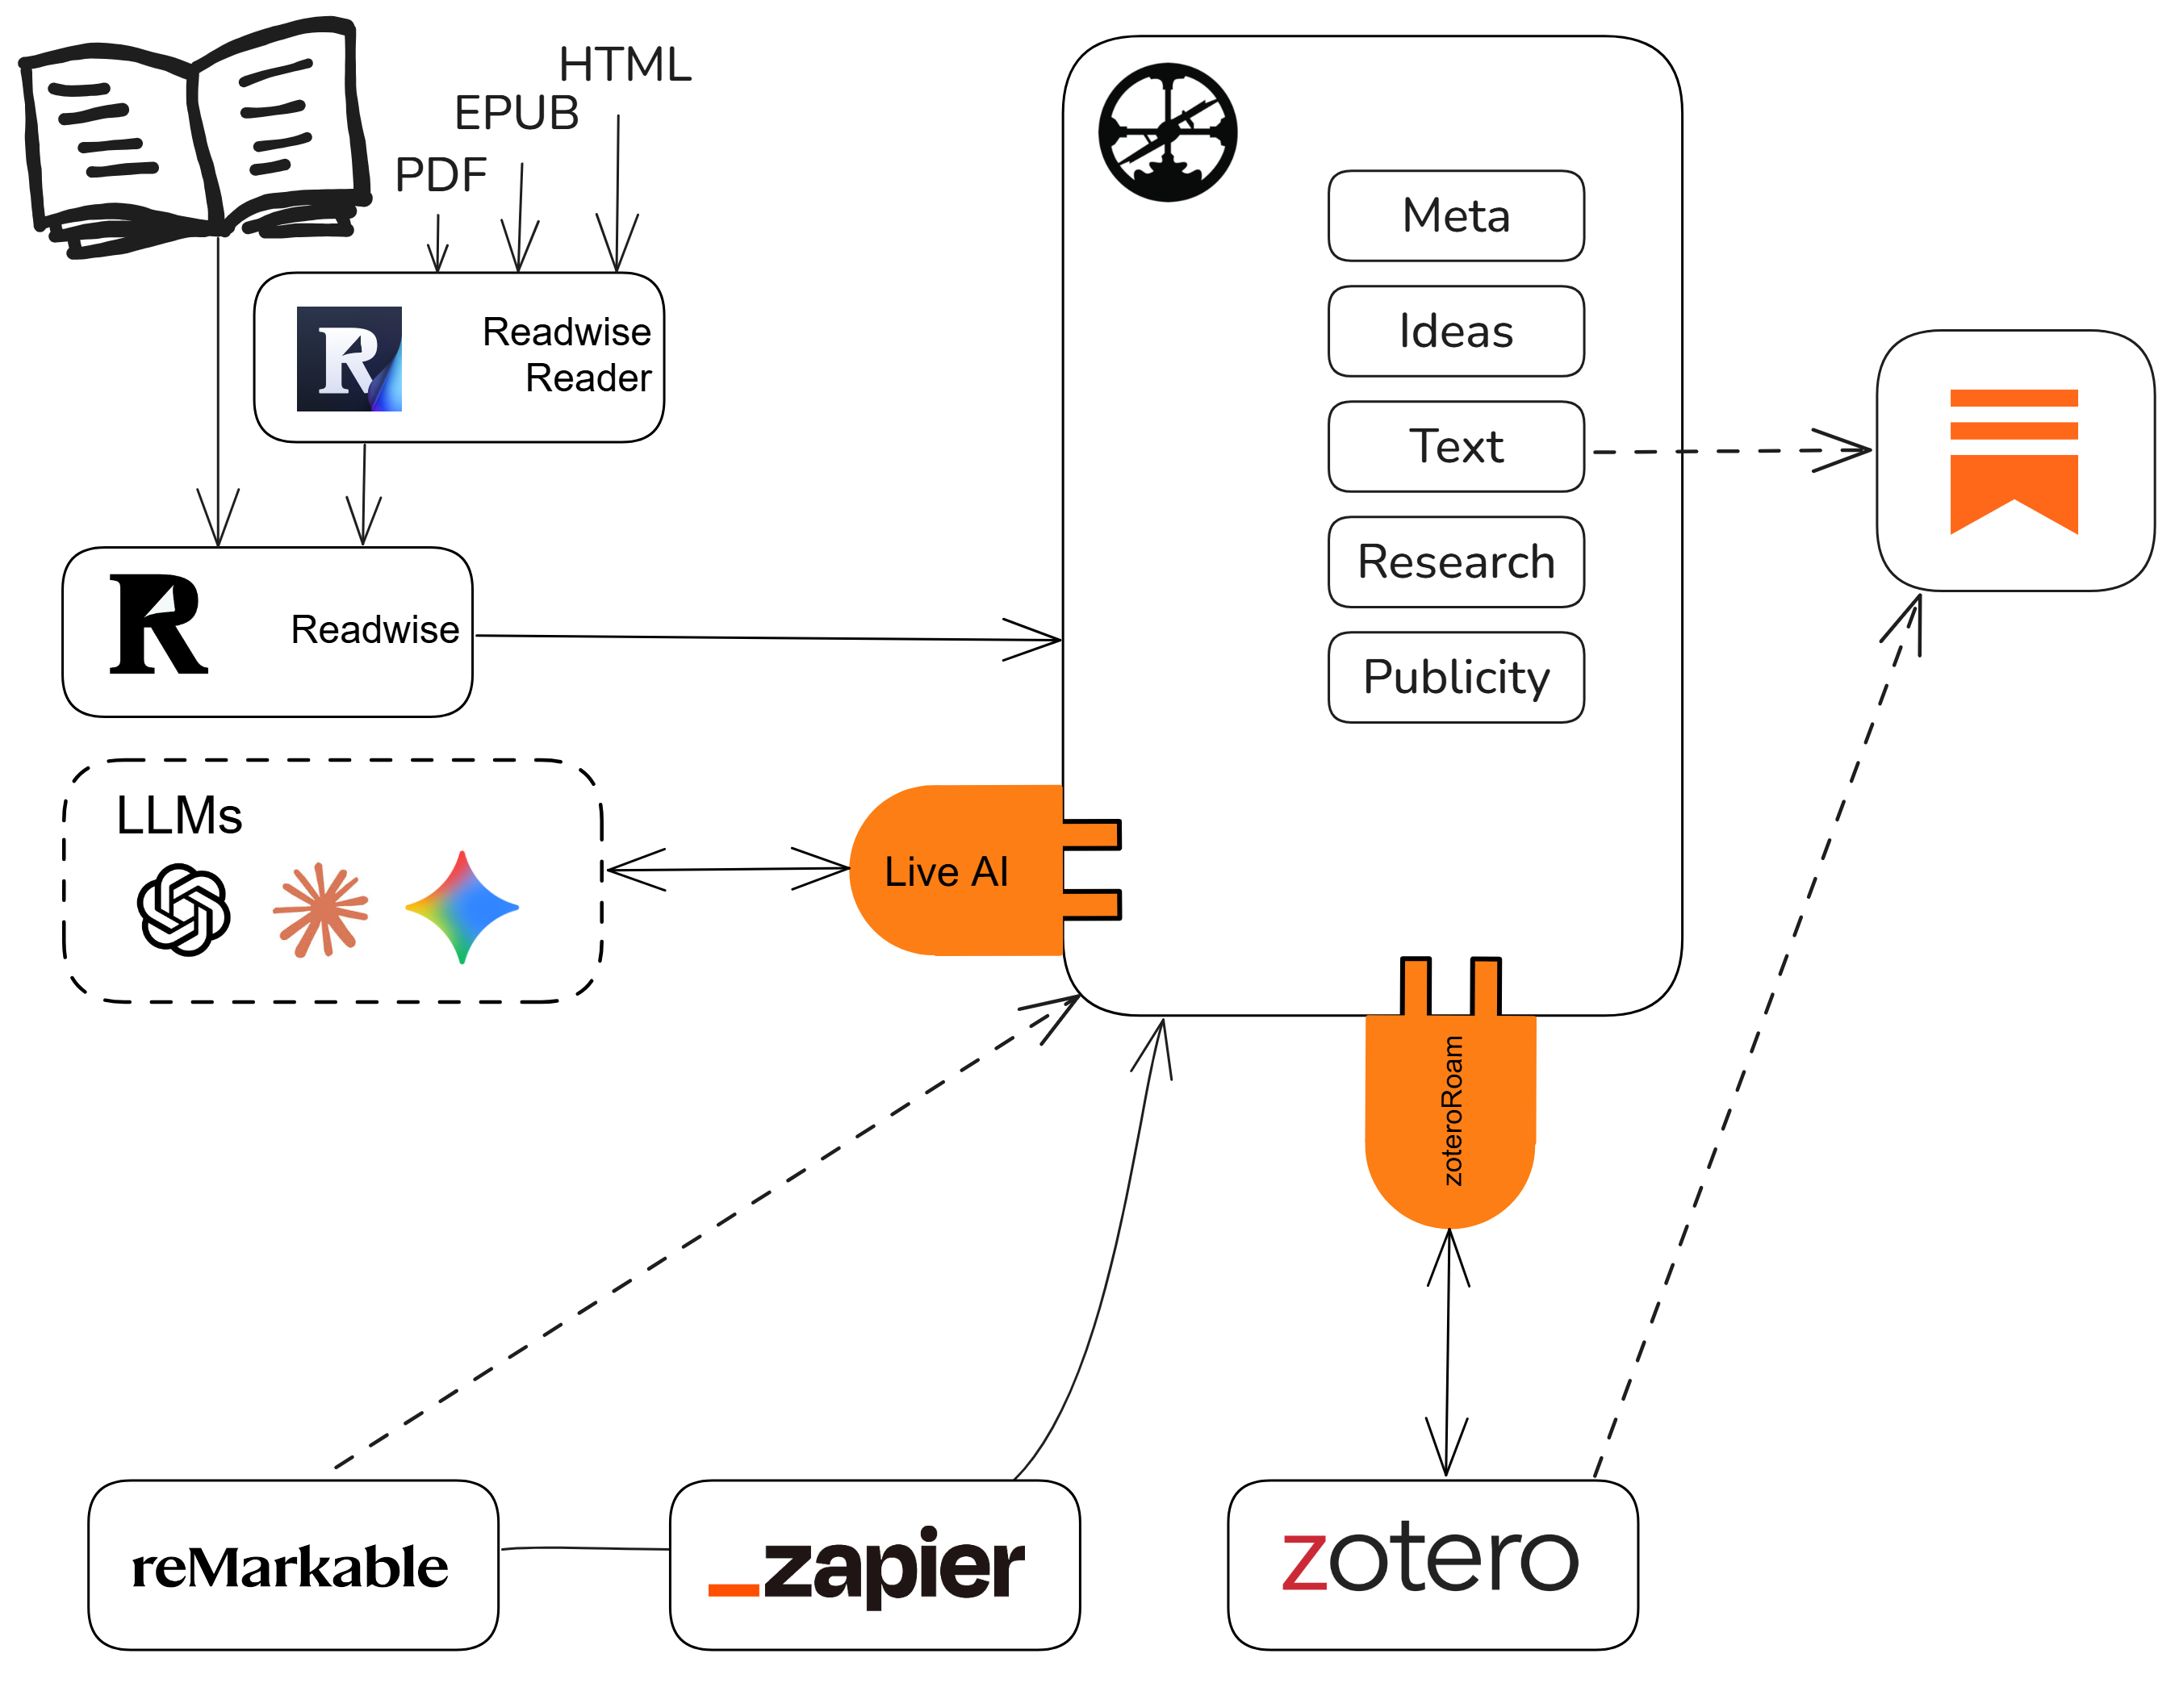
As you see in this diagram, there is also reMarkable with two arrows to Roam, one dashed, and one solid. I use reMarkable to jot ideas, draw maps, or write drafts. When I need a drawing in Roam, it comes semi-automated (the dashed line connector). When it is text, it goes directly through in Roam through a Zapier workflow (the solid line connector).
For bibliography collections, I use Zotero, and there is an excellent Roam extension for it. So normally each written work has two pages in my Roam graph: one created by the Readwise connection, which is the respective collection of annotations, and one coming from Zotero with the metadata. For frequently referred sources, the annotation page is embedded in the Zotero page.
The conversations with LLM models are enabled with the Live AI extension. I'll come back to this later.
The Blog Post template
Once it's time for a more organized work on the essay, I go to the respective Roam page and run the Blog Post template.
Last year, prompted by the Readwise tag I mentioned earlier and a query to view all unchecked or excluded items, I upgraded the template to a Smart Block. I kept the [[roam/templates]] tag so I can still trigger it on mobile or when Roam extensions are disabled.
Here's how a post page looks when the Smart Block is applied:
Well, it doesn't look like that right after I trigger it. This is how it looks when the post is published. Initially, the attributes words, URL, and publication date are with no values. The same as, which in this context is for the short Readwise tag, gets its value from filling in the field of a pop-up prompt, produced by the Smart Block.
The part above the horizontal line is the metadata section. Let’s make it clear what you see (since it depends on the CSS used): the thick gray underline is for internal links, while the thin black underline is for aliases and external links.
Like many other pages, blog post pages are typed using the [[Post]] class defined in the RIO ontology. #Publication is also a RIO class. The Roam attributes words, same as, has topic are defined as RIO properties.
I’ll explain “Ideas”, “Research,” and “Text” in separate sections after this one.
“Publicity” is where I draft posts and threads for social media and keep the post links. For the actual scheduling, I use Buffer. It can publish on Bluesky, X-twitter, LinkedIn, Mastodon, and other networks. Why do I keep links to social media posts? When I have a new thought on a post or topic, I can click the respective link and re-post it with the new thought.
“Republish” is for those posts I decide to republish on my old blog and Medium after a few months.
And “Book” is for essays from series planned to be published as a book. There, I put ideas that are not included in the essay but might be included when it becomes a chapter in the book.
Sometimes I add other sections, depending on what the post needs. Such a section might be at the root level, for example, for diagrams (like the Excalidraw diagram I used above for this one) or inside another section, as it is the case with ideas maps (an example follows).
Ideas
Once I apply the template, I put all the ideas collected initially inside the “Ideas” section. There, I also draft the outline when I need one.
In some cases, I add another level of grouping inside ideas, for example, for ideas for the title or subtitle.
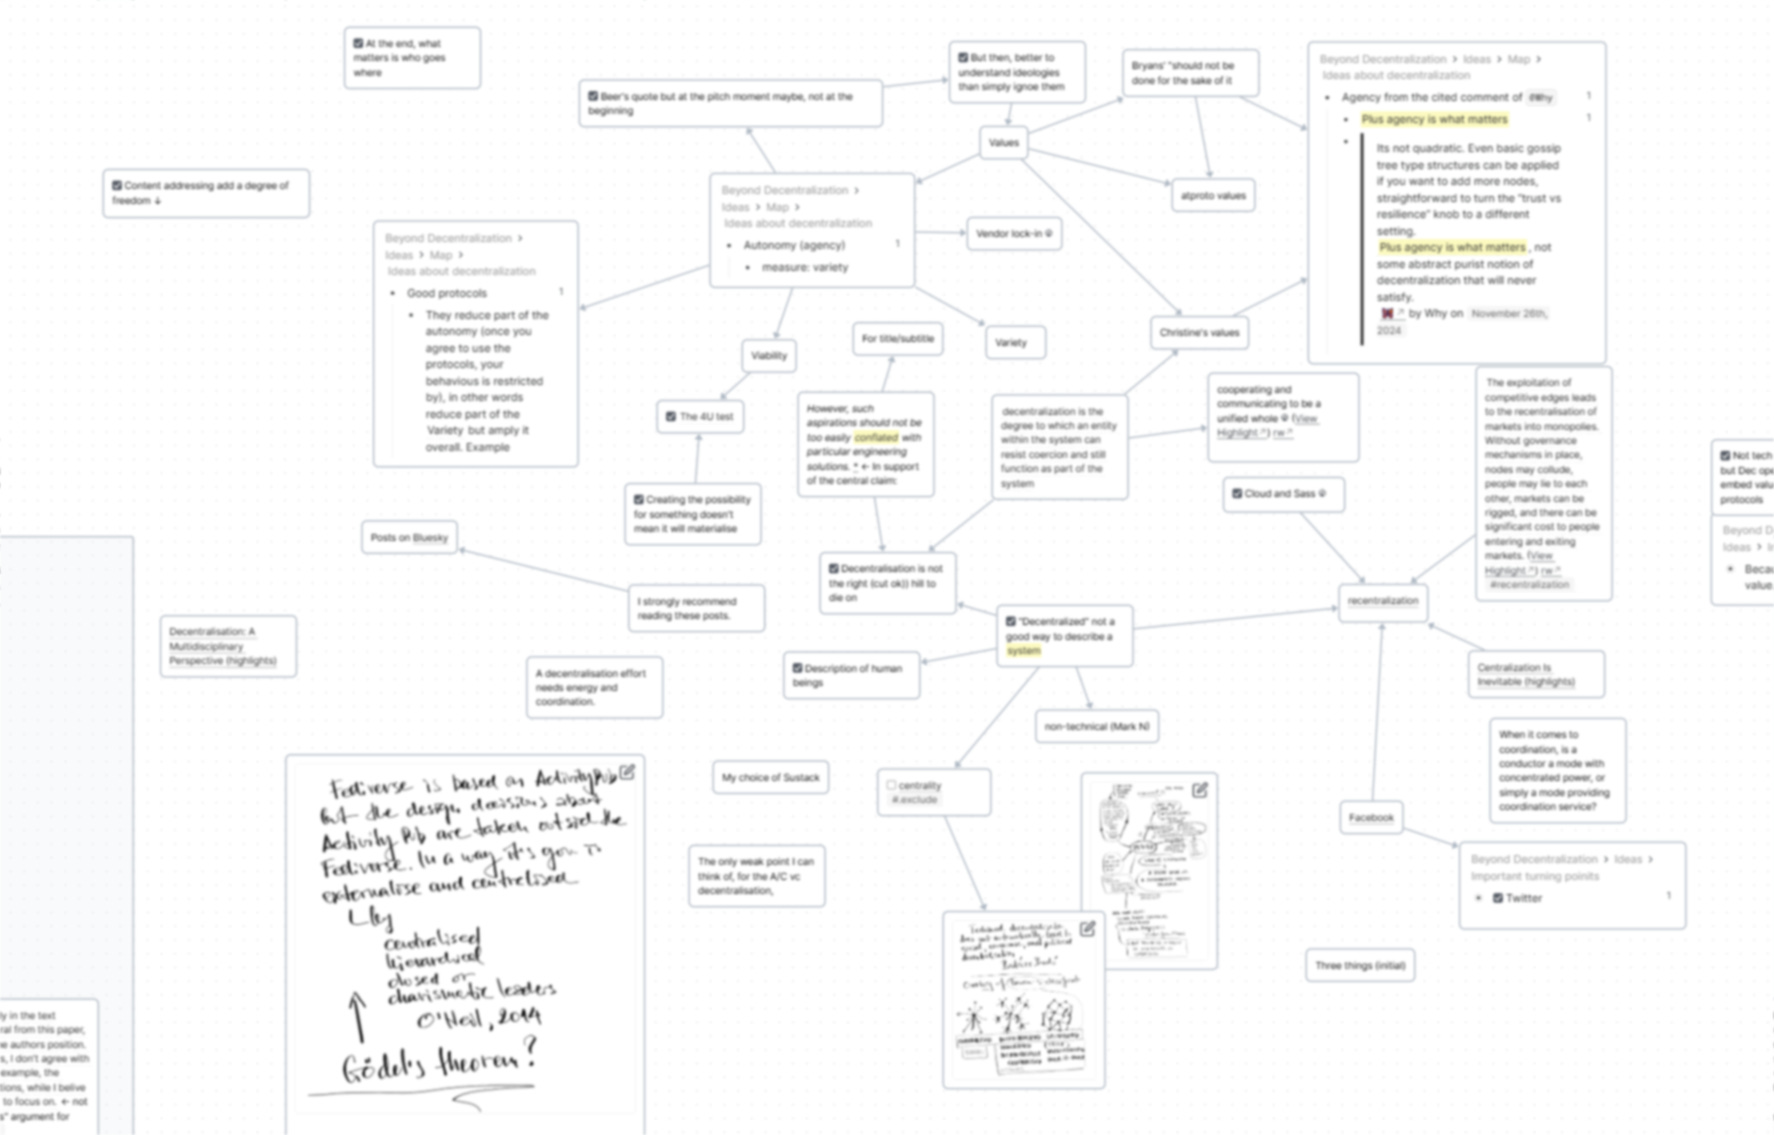
More difficult essays may get a map, which became possible when Roam upgraded their diagram to be used like a proper mapping canvas. Here's how such might look:
Ideas that are important to include are turned into to-dos.
Sometimes, idea blocks appear as block references inside the Research section to structure it. Then, when under “Ideas,” transcluded blocks from research may trigger related ideas, and vice versa — some ideas require research, so there are normally a lot of connections between child blocks of these two sections.
At the end of this section, there is a query which within the Smart Block, looks like this:
It gathers all blocks with Readwise tag, relevant tasks and notes, and excludes those that are done or rejected.
When the smart block is triggered, it brings an input box for the Readwise tag.
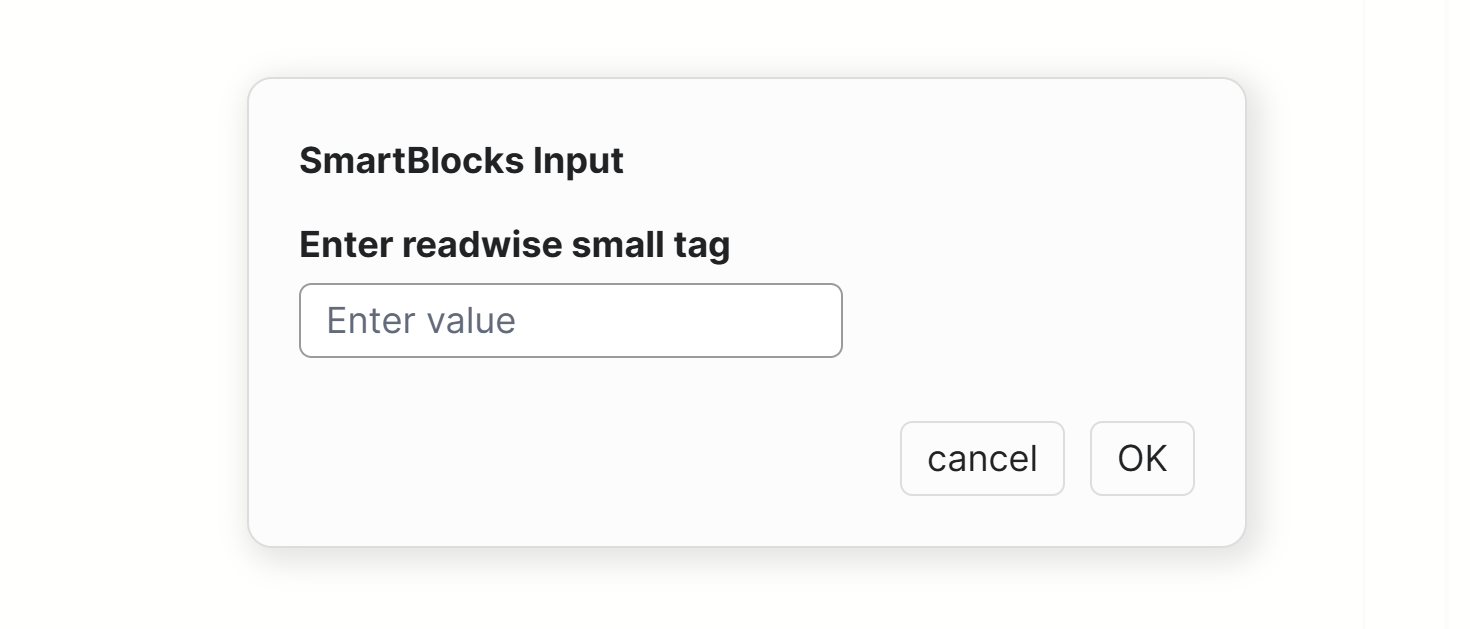
With the current Smart Block, it works well in two cases: when I don't want to use a Readwise tag, and when it is already created (then the input prompt makes a lookup). If it so happens that I more often create it from there (the third case), I change the Smart Block to expect simple entry and turn it into a tag. The respective tag (created or selected from the look-up) is put as a value for the attribute same as and as a parameter in the first {or:} clause of the query.
The query creates a view on all blocks tagged with the Readwise tag, and notes and to-dos related to the post.
Then there is a negation to exclude the metadata block with same as, which has as value the Readwise tag, and status tags such as #Processed and #Rejected. There is an invisible tag #.exclude which is on the section “Republish.” Since such tasks are not relevant for the post publishing, they should not appear in the view “All not included or checked.”
Research
The research section includes research questions and notes, as well as references to Readwise pages or blocks. Readwise pages are collections of annotations made on paper books (scanned with the Readwise app), Kindle, Hypothes.is, HTML articles, PDFs and EPUBs.
Sometimes I store the whole source text in the Roam graph. Such is the case with podcast transcripts. More recently, it also happens with some deep research reports from ChatGPT or Gemini that I decide not to send to Readwise but copy into the graph. In such cases, they get processed where they are, and only the relevant parts are brought inside the Research section of the Roam page for the essay-in-progress. By “processed” I mean restructuring, fixing and adding references and annotating.
For bringing the relevant part in, I use the wonderful “Extract highlights in the selection or page” feature of the Find & Replace extension by Fabrice Gallet. He's also the creator of the Live AI extension, which I'll explain in a minute. The extraction of highlights works similarly to the Latticework prototype of Andy Matuschak.
For research-heavy essays, the Research section has sub-sections for different topics that may or may not correspond to the sections of the essay.
Now, about LiveAI. I've been using it for a few months, and although I haven't fully explored its features, it has become an integral part of my research workflow.
For example, while working on an essay, an idea emerged that needed support from a paper I had read over a decade ago. I forgot the name, the author, everything. So, not leaving Roam, I asked the Live AI assistant about it, describing what I remembered (for example, I referenced an author I knew had referred to one such paper), and also for new research on the same topic. I received a very decent list of papers with summaries, including the one I was looking for. However, most of the provided URLs were incorrect. So, I went through them one by one to find the actual papers and then brought them with one click to Zotero, using its standard browser extension. Then, with zoteroRoam, their metadata and abstracts were imported into my Roam graph, and I placed the respective aliases in the correct positions within the blocks generated by the AI assistant. This combination of Live AI, zoteroRoam, and the context I created using the SB structure helped me weave together all the ideas and thoughts in a way that I will probably reuse beyond this particular essay.
For many use cases, these practices offer more flexibility than the chat UIs provided by AI companies. One big difference is the context curation. It can be combined from the right-side bar, list of pages, block references, and daily notes pages. And the selection gives context cost estimation before sending the prompt.
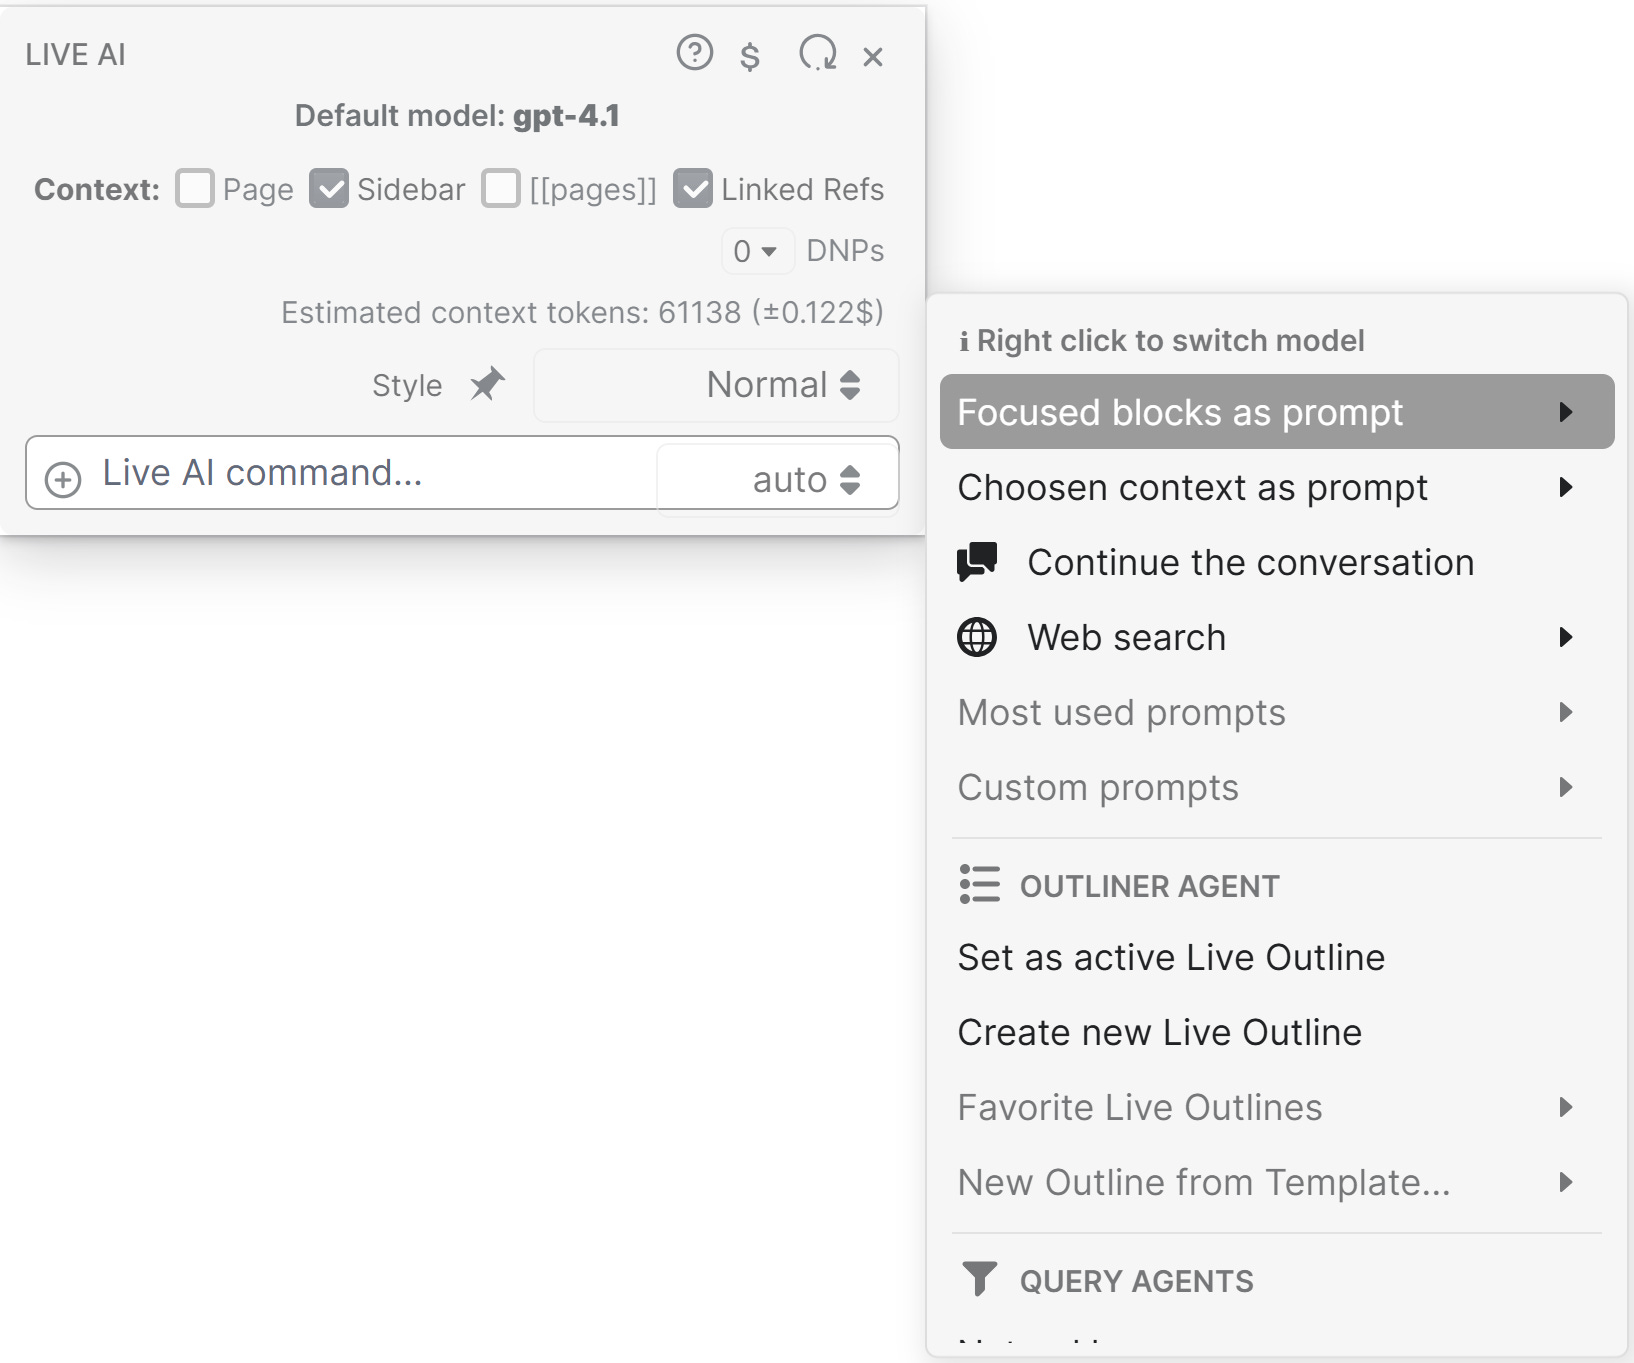
Another difference is that the conversation can start with one model, say OpenAI 4.1 and then continue with Claude Sonnet 4, and all within your main workspace.
Live AI provides an easy way to track your spending. And it seems way cheaper than a monthly subscription.
Writing
The writing process involves a text layer and a meta-layer. By meta-layer, I mean content ideas, footnotes, notes on style issues, general to-dos and specific to-dos like links of footnotes to add. They have to be captured but not interfere for the moment, to keep the balance and not let the writing get weave-heavy.
Text layer
When working on a text in Roam, my top requirement is a clean, text-only immersive experience. That involved making style changes to hide block markers and keep it flat, using a larger font that is good for writing and so on. So my draft block, which is inside the “Text” section, is pre-tagged with #.rm-focus, a hidden tag triggering a dedicated focus CSS when zooming in on the top block. Once in, my screen looks like this:
That's what I meant in that tweet by “Just write!” The tool should disappear entirely.
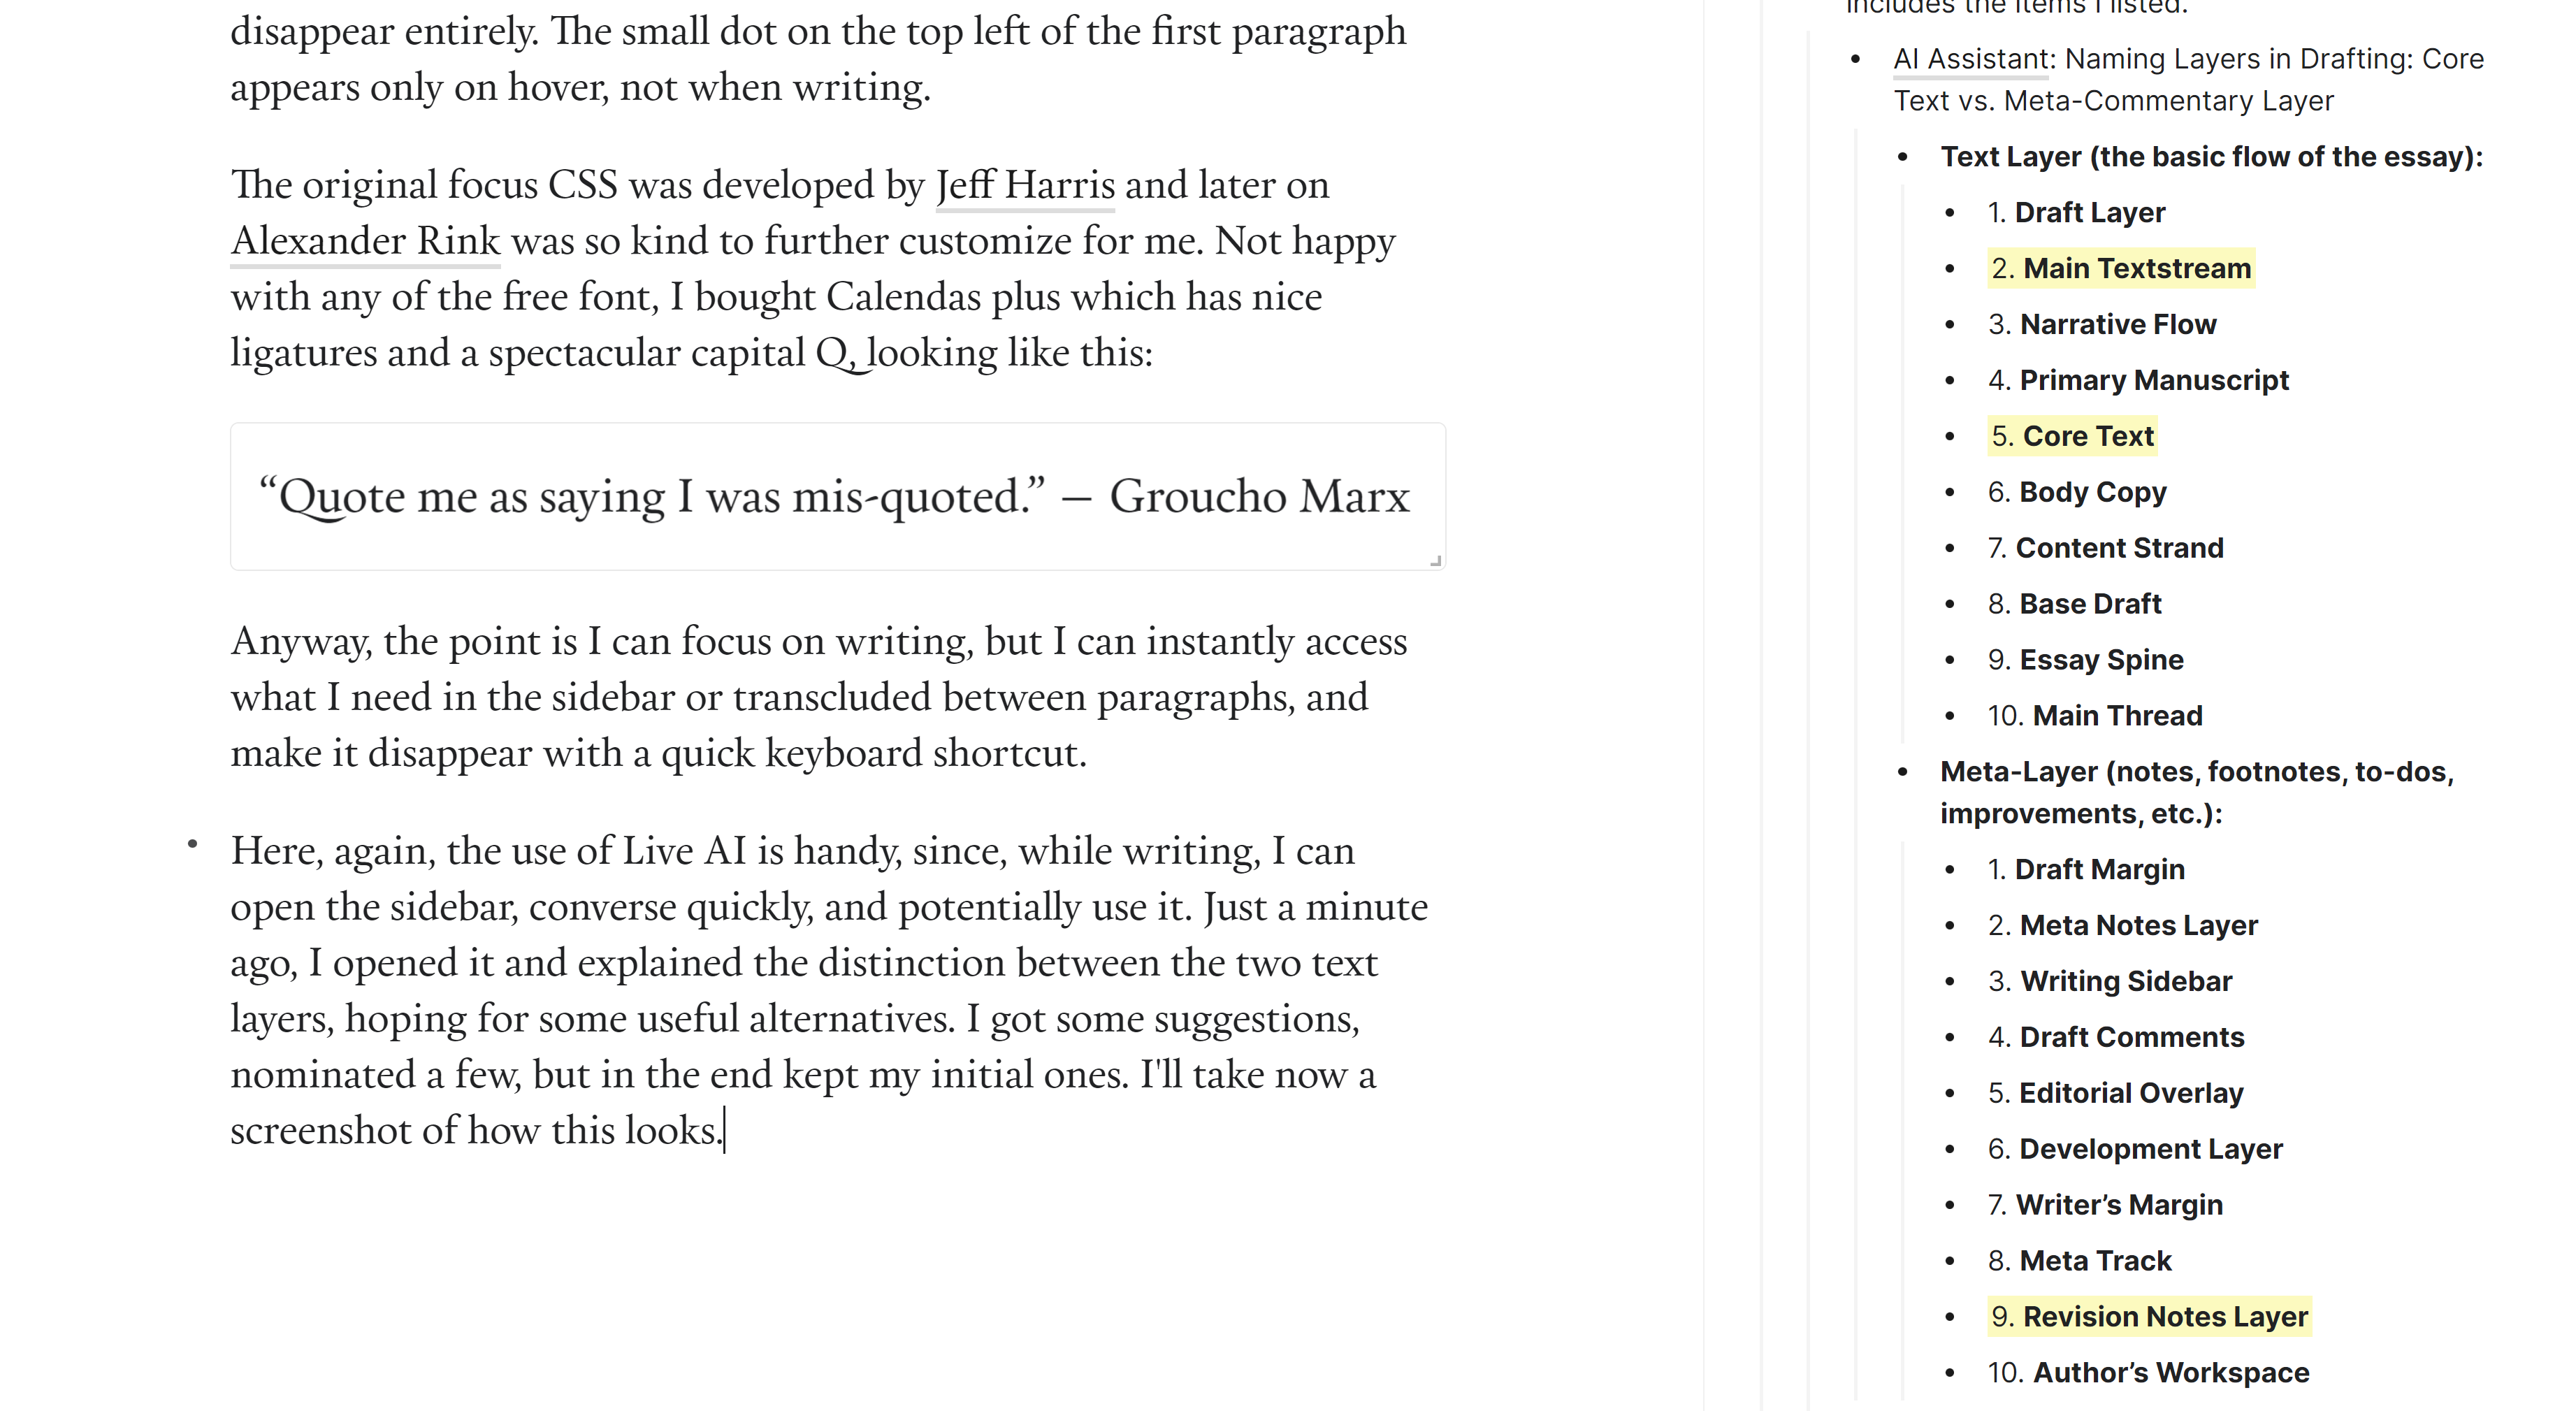
The original focus CSS was developed by Jeff Harris and further improved byAlexander Rink.
Since I wasn't happy with any of the free fonts, I bought Calendas Plus. It has beautiful ligatures. Its most characteristic feature is the magnificent capital Q:

Anyway, my aesthetic preferences aside, the point is I can focus on writing. Still, I can instantly access what I need in the sidebar or transcluded between paragraphs, and make it disappear again with a quick keyboard shortcut. Write and weave.
Live AI is handy here, since, while writing, I can open the sidebar, converse quickly, and potentially take some of the results into account, with minimum interruption of the flow. Just a minute ago, I opened it and explained the distinction between the two text layers, hoping for some useful alternatives. I got some suggestions, nominated a few, but in the end, kept my initial ones. I'll take a screenshot now of how this looks. Here it is:
Meta-layer
While writing, there are plenty of issues that need to be captured as quickly as possible, without letting them break the flow. In case of writing with the intention to publish on Substack, one way to distinguish these issues is by the stage they need to be closed: while the draft is in Roam or when it is on Substack.
What may happen during writing? An idea to add a link or a footnote, something to research further, a styling issue to look into later and so on.
When it is an issue to be closed during the Roam stage of the draft, I use either the built-in comments feature or the Footnotes extension. The good thing about it is that I can invoke it to appear transcluded between the paragraphs in the second pass, and either change the text, based on it, or edit the note. Here's an example of such a comment from the current draft:
I've made the screenshot with an open sidebar, only to show how the two collections of such issue notes appear in the essay page, with all blocks collapsed, only the one called notes expanded.
With some CSS, block references can appear as marginalia. Here's how the same comment can look:
This was the case when the issue note is about the whole paragraph. When it is for a particular part in the text, then I use either parentheticals, which nicely collapse and expand inline, or the footnotes from the Footnote extension by Fabrice Gallet. Footnotes can also be created from inline block-search, similar to parentheticals. The numbered items under “Notes” on the sidebar in the screenshot before the one with marginalia show notes created with the Footnotes extension.
All issue notes that need to be dealt with at Roam stage are created as Roam comments or footnotes. When the text is pasted to Substack, all of them should be closed since there they will appear as meaningless identifiers.
The issue notes to be dealt with at the Substack stage are created as parentheticals. There are two benefits. When in Roam, they don't disturb the editing since they are collapsed. In Substack, they do disturb the editing, as they should, so that the link or the footnote is added. It's also easy to check at the end if something is remaining to be done, since there is no other reason to have double parentheses in the text.
That's it. It was very lengthy to explain, but it is simple to use. Now, a few more things about queries over multiple posts, and at the end — all the code.
Publication views
The publication itself, in this case Substack, has its own page in Roam. I'm not going to go through it since this is not what the current essay is about. But there are a few sections with queries, using the post metadata, which create useful views. The most basic view is that for all published posts:
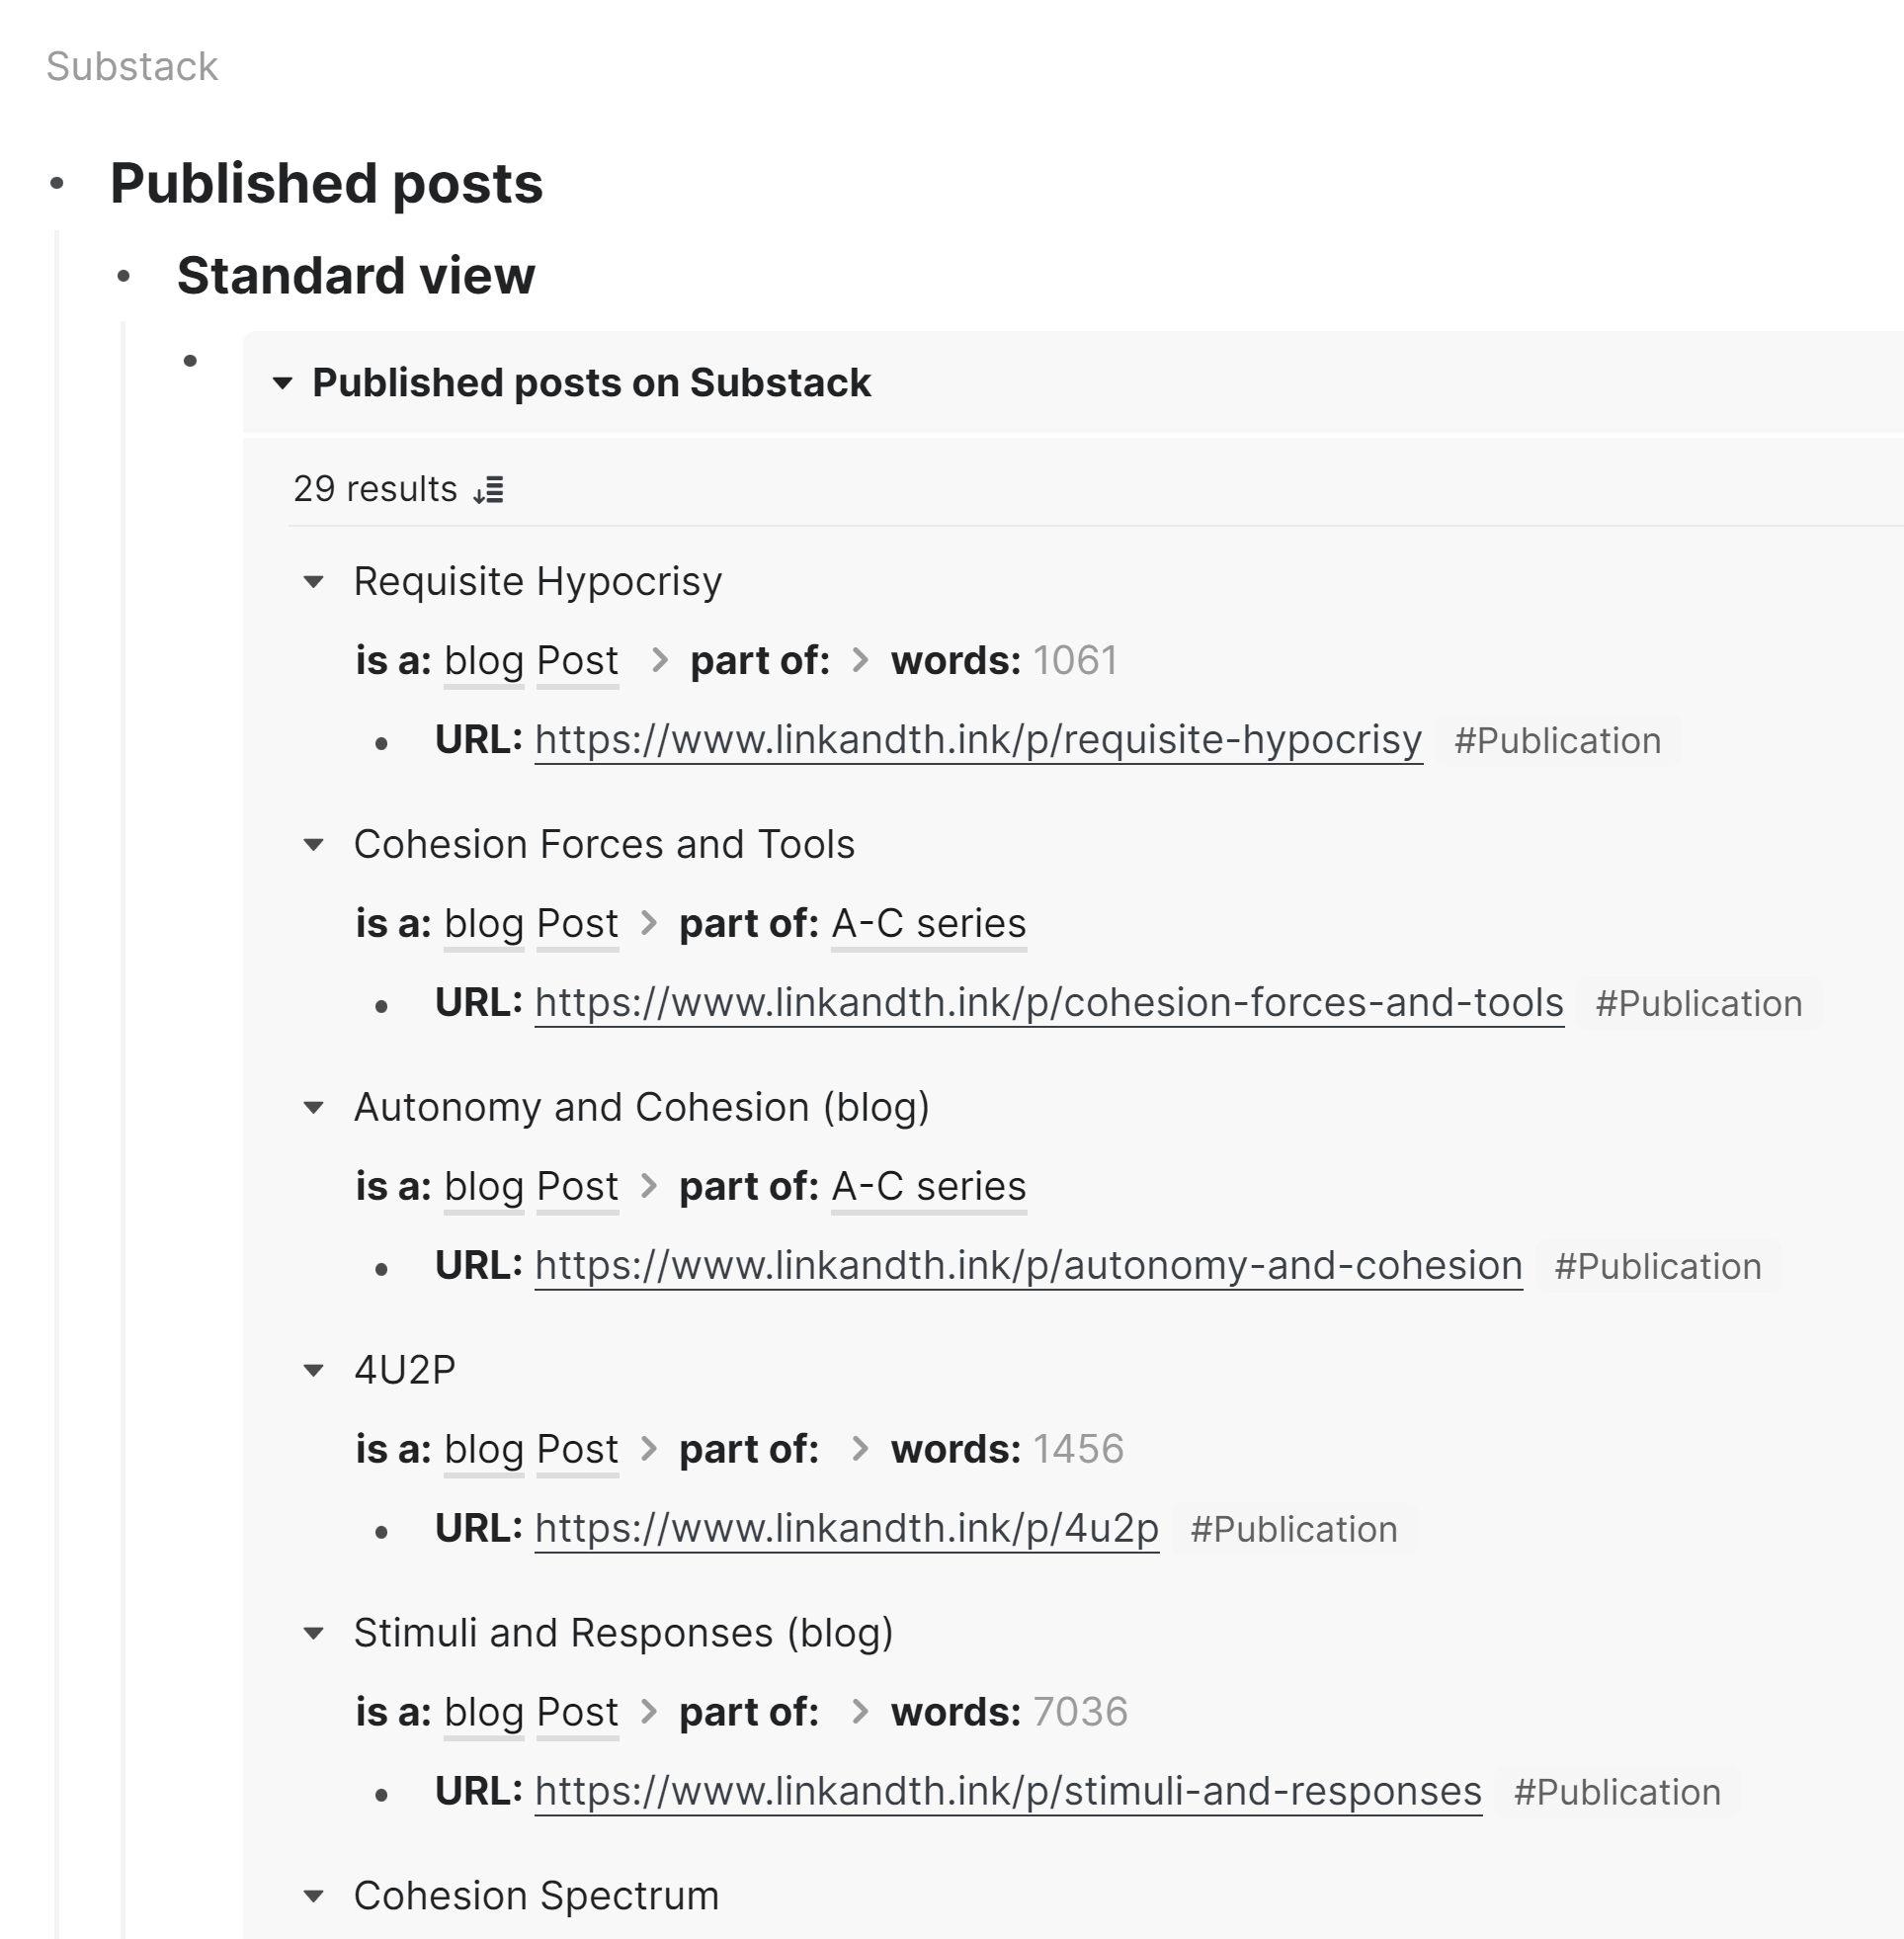
Now you see already one of the benefits of keeping most of the metadata nested. The view created by a standard Roam query shows a lot of useful information at once: the name of the post, which series it is part of, number words and the link to the post. The other benefit of nesting metadata, as opposed to the more common practice of keeping it at one level, is that simple queries only work for references that are on the same path.
It’s important to note that I put the URL of the post and the tag #Publication, only then is the post published.
This view has plenty of uses. For example, in the following screenshot, when I was writing this text, I used it simply to add hyperlinks to other posts (I’m using Vivaldi, but I guess other browsers allow tab tiling as well).
While this view of all published posts was achieved in the simplest possible way, just with a standard query, the other report, word count, went to the other extreme. The end result looks neat,
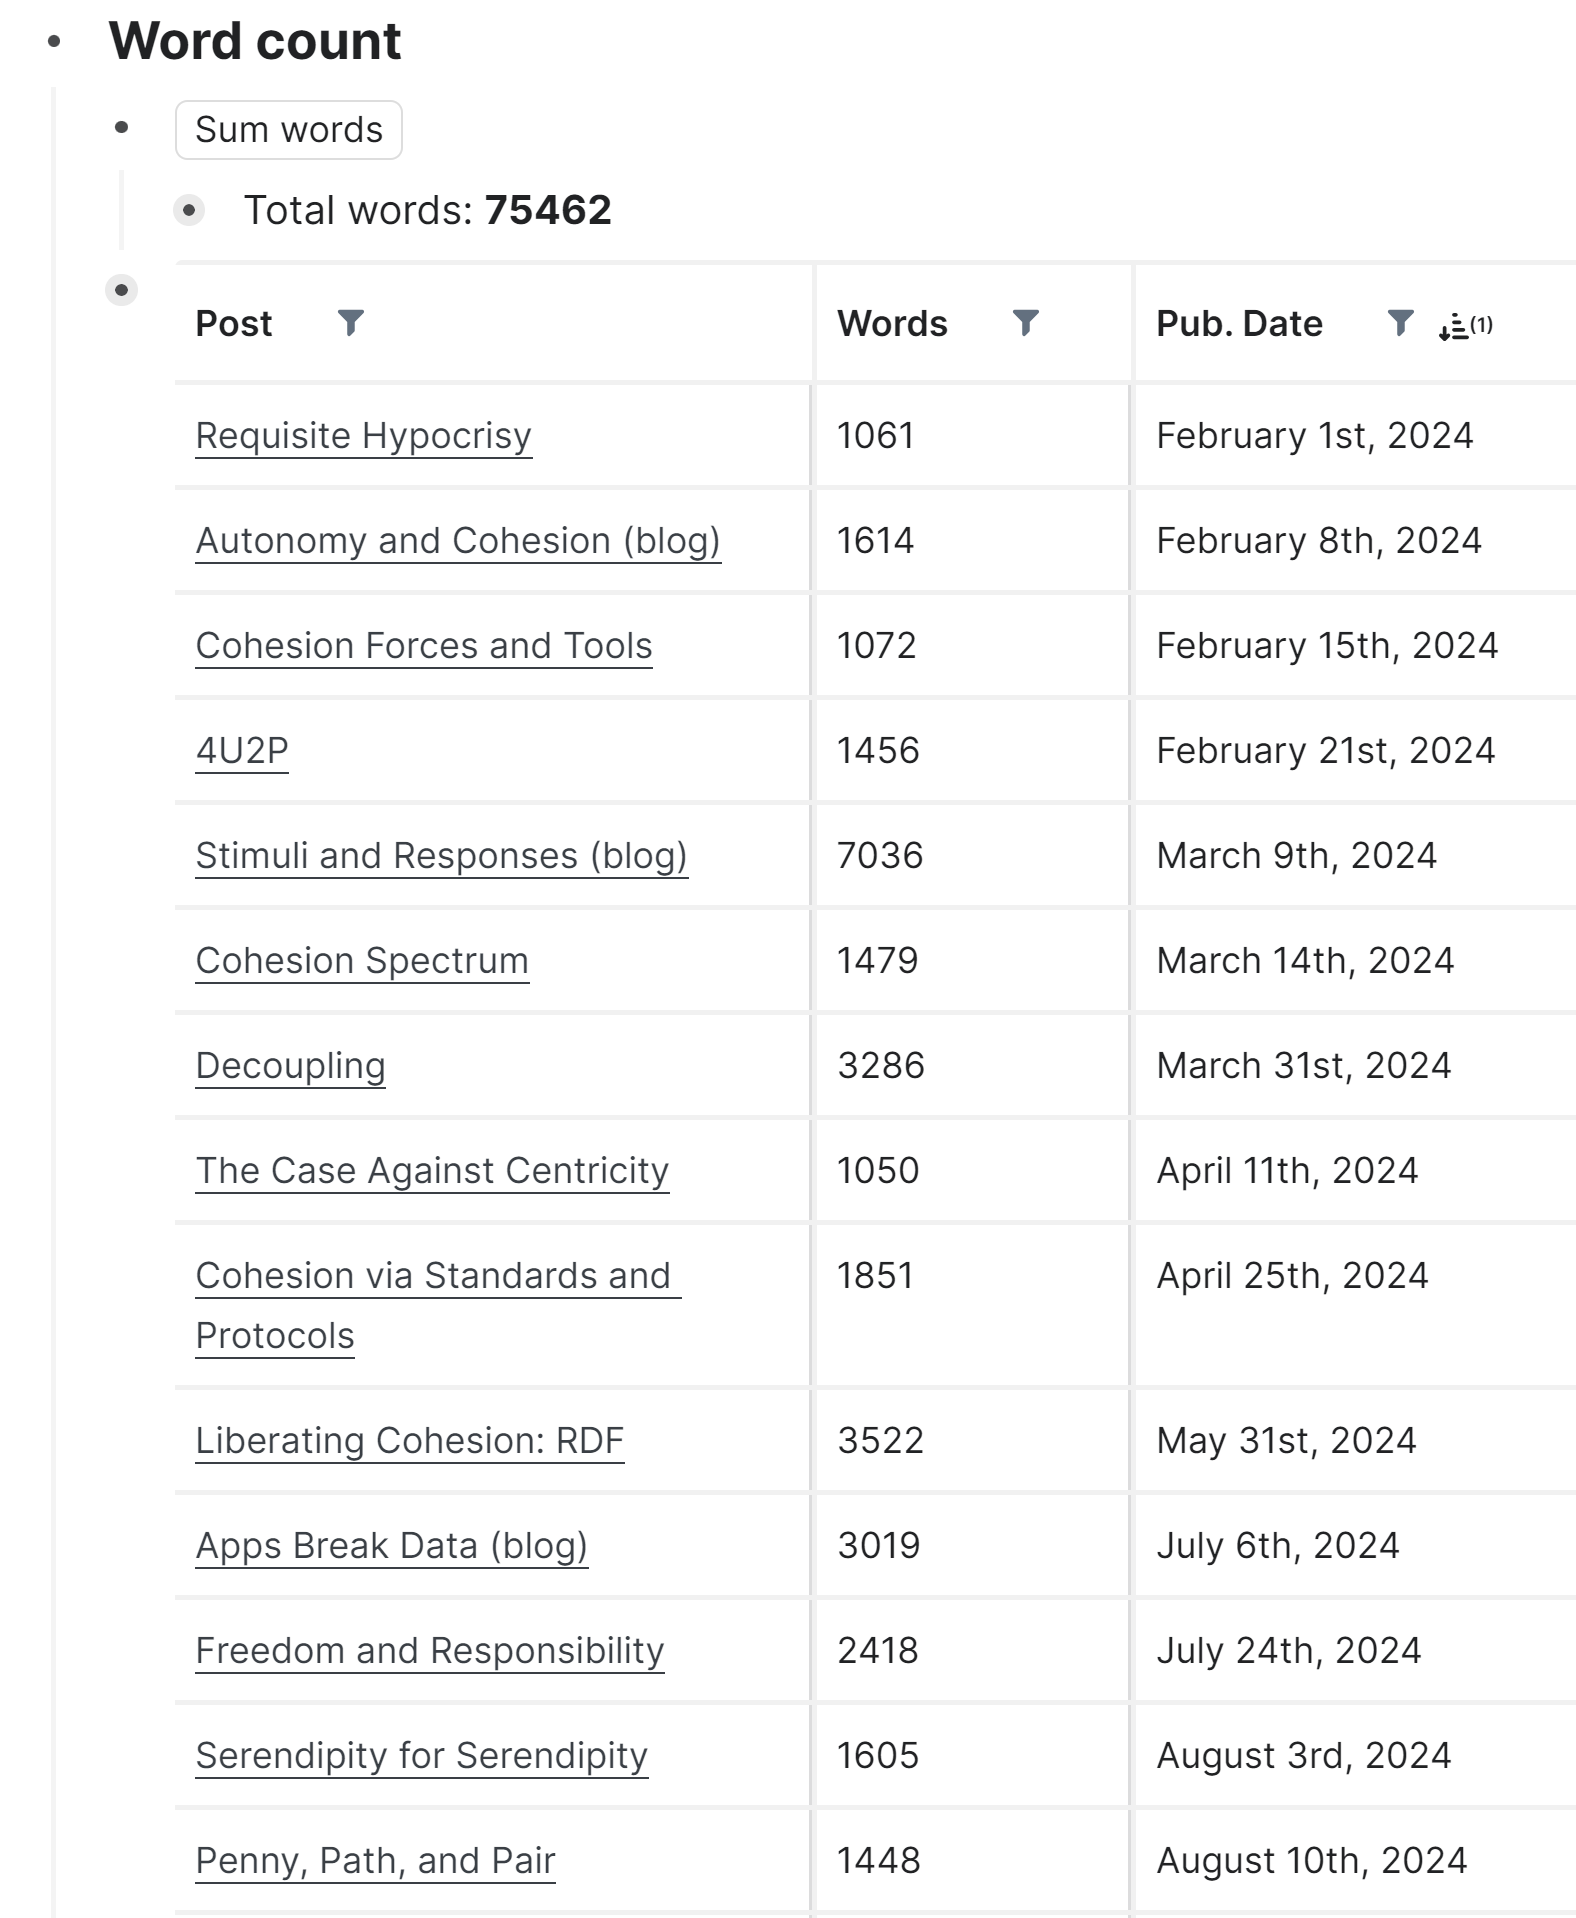
but what's behind is not. It involved an interplay between a Smart Block, a Clojure Script and the Query Builder extension. I couldn't find a simpler way to do it and didn't get any helpful tips when asking around. While it is indeed quite useful, if it wasn't fun finding the solution, I probably wouldn't have bothered with it. Anyway, it's there, and if you want to, you can just copy it and use it. If you have any questions, put them in the comments. If you have found a more elegant way to do it, please share.
In the next section, you’ll find all the smart blocks, queries and scripts used.
